


Every dog deserves a treat — but not all store-bought options are made equal. Many commercial dog biscuits contain artificial preservatives, fillers, and additives that don’t do much for your pup’s health.
That’s why more dog owners are turning to homemade 3-ingredient dog biscuits. They’re easy to make, budget-friendly, and packed with real, wholesome ingredients your dog will love. Plus, you get the peace of mind of knowing exactly what goes into every crunchy bite.
🦴 The Beauty of 3-Ingredient Dog Biscuits
You don’t need to be a professional baker or own fancy kitchen tools to whip up delicious dog treats. With just three simple ingredients, you can make a batch of healthy biscuits in under 30 minutes.
These treats are:
- Quick to prepare
- Made from everyday pantry staples
- Tail-waggingly tasty
- Perfect for dogs with sensitive stomachs
Let’s dive into some of the best 3-ingredient dog biscuit recipes you can make at home today.


🍌 1. Banana & Oat 3-Ingredient Dog Biscuits

Perfect for: Dogs who love a touch of natural sweetness.
Ingredients:
- 1 ripe banana
- 1 cup rolled oats
- 1 egg
Instructions:
- Preheat your oven to 350°F (175°C) and line a baking tray with parchment paper.
- Mash the banana in a mixing bowl until smooth.
- Add the egg and stir until fully combined.
- Gradually mix in the oats until a dough forms.
- Roll out the dough and cut it into fun shapes using a bone-shaped cookie cutter.
- Bake for 15–18 minutes, or until golden brown and firm.
- Let them cool completely before serving.
Storage tip: Keep these biscuits in an airtight container for up to 5 days, or freeze for longer freshness.
Why it works: Bananas are rich in potassium and fiber, while oats aid digestion — a win-win for both flavor and health!

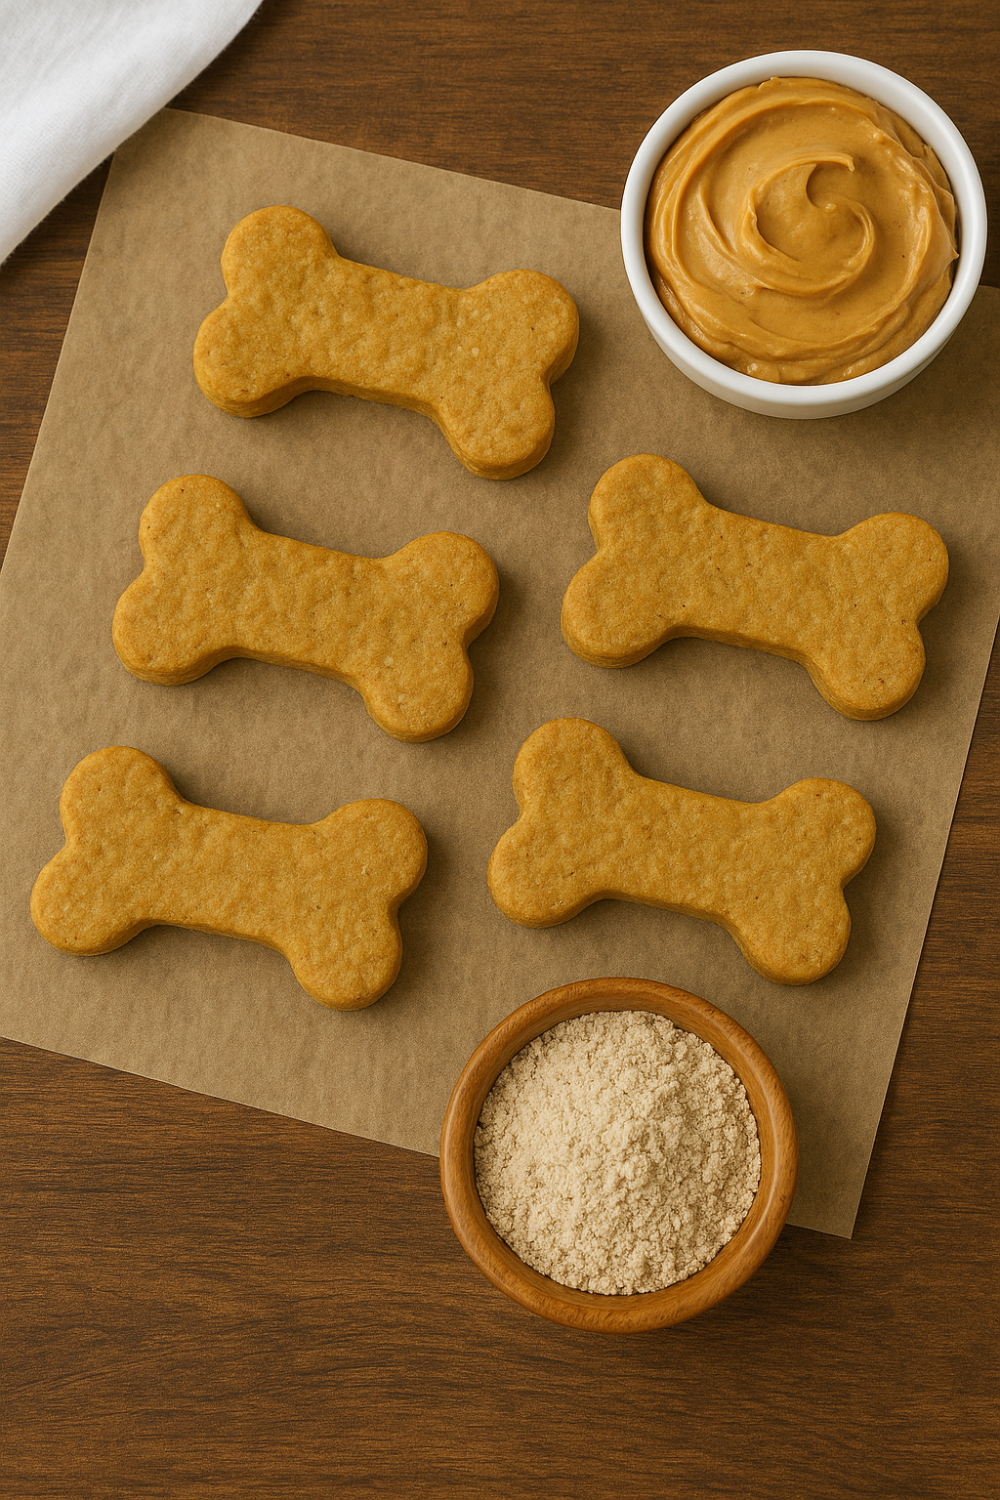
🥜 2. Peanut Butter & Pumpkin 3-Ingredient Dog Biscuits
Perfect for: Fall-inspired flavors and extra fiber.
Ingredients:
- 1 cup canned pumpkin puree (not pumpkin pie filling)
- ½ cup natural peanut butter (unsalted, xylitol-free)
- 2 cups whole wheat flour
Instructions:
- Preheat oven to 350°F (175°C).
- In a bowl, mix pumpkin puree and peanut butter until smooth.
- Add flour gradually and knead into a soft dough.
- Roll out the dough and cut into shapes.
- Place on a lined baking tray and bake for 20–25 minutes, or until firm and slightly browned.
- Cool before serving.
Storage: Lasts up to a week in a sealed jar or up to 3 months in the freezer.
Health benefits:
- Pumpkin supports healthy digestion.
- Peanut butter adds protein and healthy fats.
Your kitchen will smell amazing — and your dog will probably wait by the oven!
🥕 3. Carrot & Apple Dog Biscuits

Perfect for: Dogs that love a fruity crunch.
Ingredients:
- 1 carrot (finely grated)
- 1 small apple (grated, seeds removed)
- 1 ½ cups oat flour or whole wheat flour
Instructions:
- Preheat oven to 350°F (175°C).
- Mix grated carrot and apple in a bowl.
- Add flour and stir until you get a thick dough.
- Roll out and cut into bite-sized shapes.
- Bake for 20 minutes until slightly crispy.
- Allow to cool before rewarding your furry friend.
Storage: Store in an airtight container for up to 5 days.
Why it works: Apples and carrots are loaded with vitamins A and C, boosting immune health and keeping your dog’s coat shiny.
🧀 4. Cheesy Oat Dog Biscuits
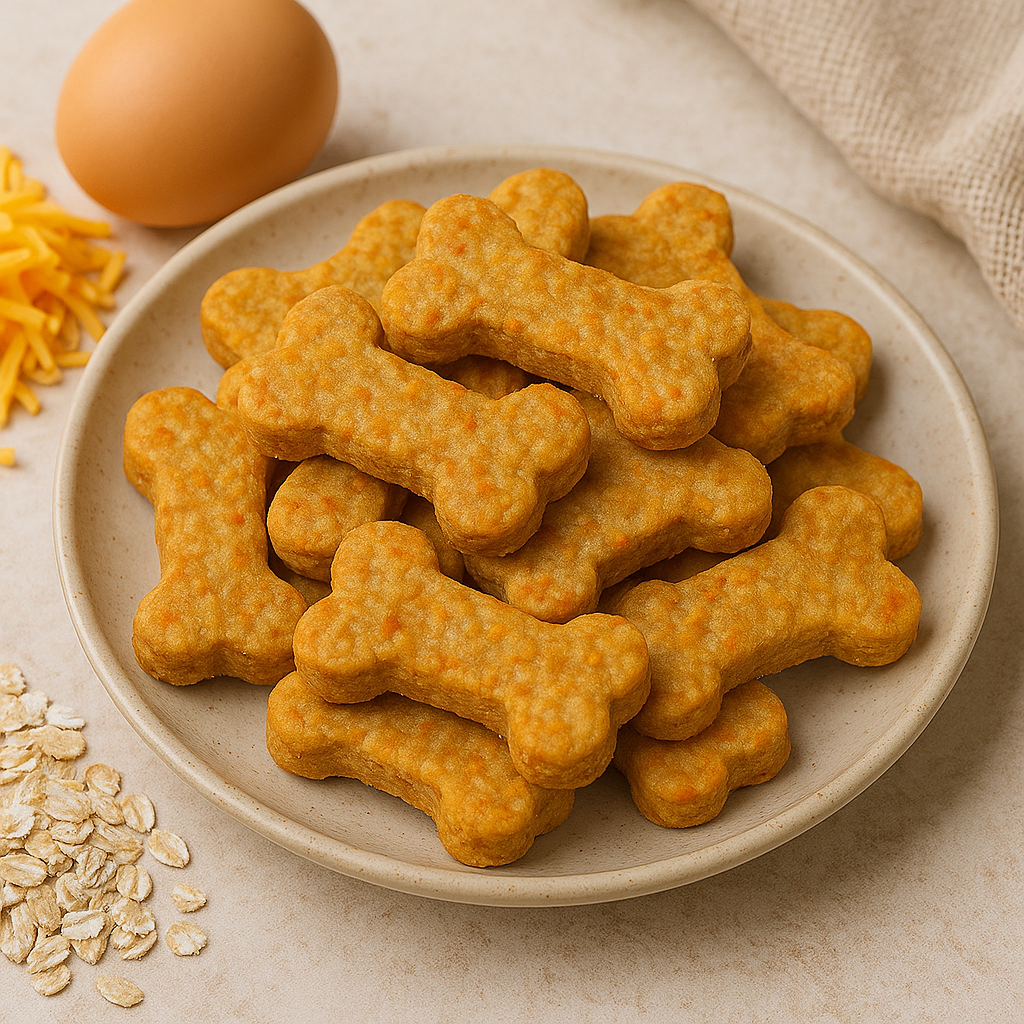
Perfect for: Dogs who love savory snacks.
Ingredients:
- 1 cup rolled oats
- ½ cup shredded cheddar cheese
- 1 egg
Instructions:
- Preheat oven to 350°F (175°C).
- Blend oats into a coarse flour using a food processor.
- Mix oats, cheese, and egg in a bowl to form dough.
- Shape into small biscuits and bake for 15–18 minutes.
- Cool on a rack and store in an airtight container.
Why it works: Cheese is a great source of calcium and protein — just feed in moderation, especially for lactose-sensitive pups.
🍯 5. Sweet Potato Dog Biscuits
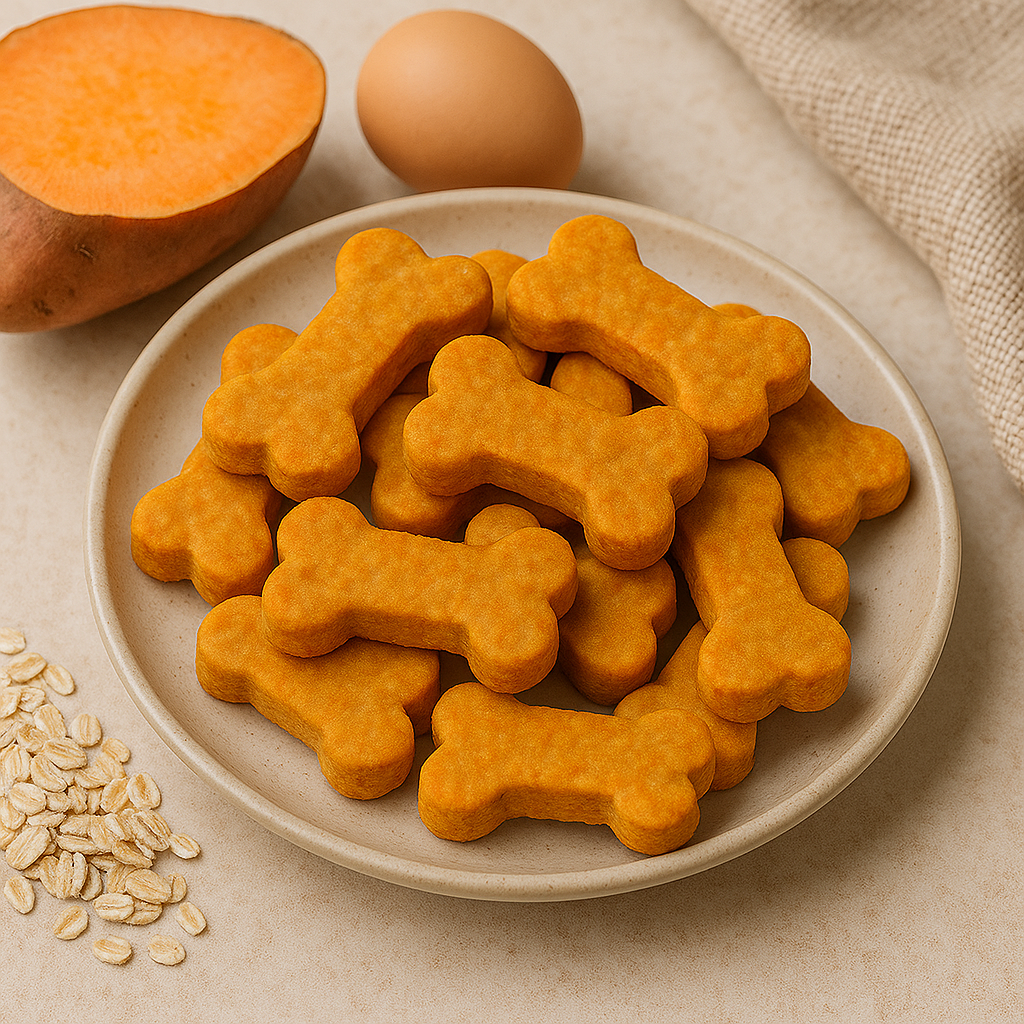
Perfect for: Dogs with sensitive stomachs.
Ingredients:
- 1 cup mashed sweet potato
- 1 egg
- 1 ½ cups oat flour
Instructions:
- Preheat oven to 350°F (175°C).
- Mix sweet potato and egg together in a bowl.
- Add oat flour gradually to create a soft dough.
- Roll and cut into shapes or simply flatten small balls with a fork.
- Bake for 20–25 minutes, then cool completely.
Why it works: Sweet potatoes are rich in fiber, beta-carotene, and vitamins — great for gut and skin health.
🧁 Tips for Perfect 3-Ingredient Dog Biscuits Every Time
Here are a few quick pointers to make sure your biscuits turn out great and safe for your dog:
- Avoid harmful ingredients — never use xylitol, chocolate, raisins, or artificial sweeteners.
- Use natural peanut butter — check the label for “xylitol-free.”
- Adjust the texture — if the dough feels too sticky, add more flour; if too dry, add a bit of water or pumpkin puree.
- Cool completely before storage — moisture leads to mold.
- Freeze extras — most biscuits freeze well for up to 3 months.
🩺 Are Homemade Dog Biscuits Safe?
Yes — as long as you use dog-safe ingredients and bake them thoroughly. Always check with your vet if your dog has specific allergies or sensitivities.
Homemade dog biscuits are:
- Free from artificial preservatives
- Packed with nutrients from whole foods
- Customizable for your dog’s dietary needs
You can even tweak the recipes by swapping oats for rice flour, or pumpkin for mashed sweet potato — keeping variety in your dog’s diet.
💡 Creative Ways to Customize
Once you master these simple 3-ingredient bases, try customizing your recipes:
- Add a flavor boost: Sprinkle cinnamon or turmeric (anti-inflammatory benefits).
- Change the texture: Bake longer for crunchy biscuits, shorter for softer treats.
- Add natural color: Mix in spinach puree for green biscuits or beet powder for pink ones.
Your pup will love the variety — and your Pinterest followers will love the vibrant photos!
❤️ Final Thoughts
Making 3-ingredient dog biscuits at home is one of the simplest ways to treat your dog with love — literally. These recipes are quick, nutritious, and easy to customize for any pup. Whether you’re baking peanut butter bites, pumpkin treats, or cheesy biscuits, each batch will make your furry friend’s tail wag with joy.
And the best part? You’ll know every single ingredient that goes into their snacks — because you made them yourself.
So preheat that oven, grab your favorite cookie cutter, and get baking.
Your dog will thank you with every crunch!


Discussion about this post