


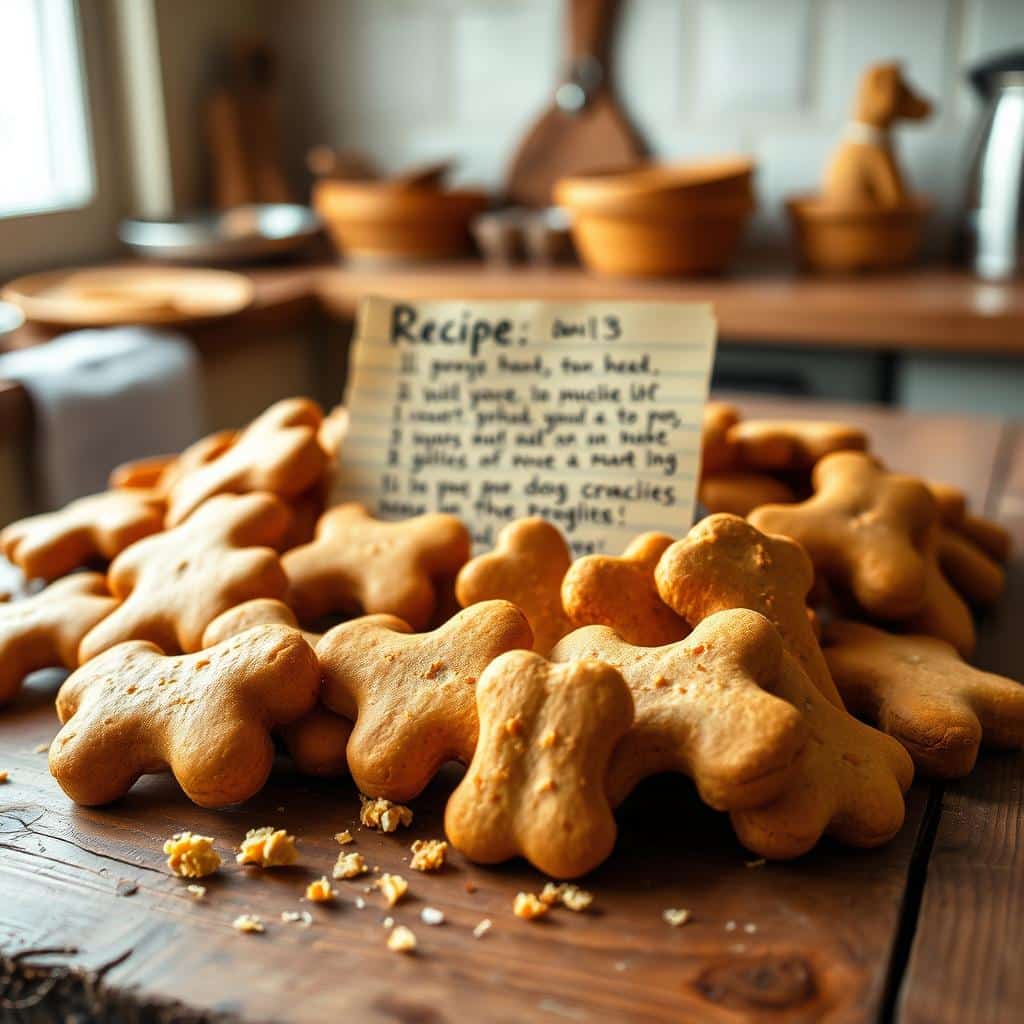
Fresh from the oven, these DIY Dog Biscuits will win your dog’s heart. They make your kitchen smell like cookies and use safe, simple ingredients. You’ll learn how to make dog treats with items found in your pantry. The result is cost-effective, healthy dog biscuits perfect for any pet owner.
Start with an easy dog biscuit recipe using real, wholesome food. Use oat flour made from rolled oats, peanut butter that’s just peanuts, and either mashed sweet potato or pumpkin purée. Since there’s no leavening, you can roll the dough to any thickness. This lets you customize the biscuits for your dog.
Sweet potato biscuits become tender, then crisp after a bit more baking. Pumpkin treats are just as easy and keep your kitchen smelling great. They cost less than store-bought and let you control the ingredients. Your dog enjoys natural treats, and you enjoy a great-smelling kitchen and peace of mind.
Next up, we’ll give you tips on dealing with allergens, making large batches, and following safety rules. These tips help ensure your homemade dog treats are always delicious, safe, and easy to make. You’ll want to bake them over and over.

Why Homemade, Oven-Baked Dog Treats Are Worth It for Your Pup
Making dog treats at home adds a personal touch to every snack. You’ll enjoy fresh scents, easy recipes, and the option to customize treat textures. This approach lets you control what goes into the treats without the high cost. It’s a budget-friendly way to give your dog something special.


Control the Ingredients and Avoid Common Allergens
Begin with natural peanut butter that contains only peanuts. Avoiding sweeteners and additives helps keep treats free from hidden sugars and safe for dogs with allergies. For those avoiding wheat, use oat flour instead by blending oats until fine. If wheat is okay, a little whole wheat flour can help with the texture.
Use unsweetened pumpkin purée or mashed sweet potato, making sure they’re pure. Labels should only list the main ingredient—a good tip to avoid harmful xylitol. Keep your recipe simple without baking powder or soda. Then, tailor the treat size for small training bits or larger treats for more fun.
Save Money with Batch Baking and Long-Lasting Storage
Batch baking treats in your oven is both easy and cost-efficient. Making a lot at once is usually cheaper than buying from stores, so you save money. You can shape the treats in small or large sizes to make the most of your dough.
After baking, let them cool completely then think about how to store them. Crunchy treats last longer in airtight containers at room temperature. Soft treats are best kept in the fridge for up to a week or frozen for longer. Freeze leftover sweet potato in portions to speed up your next baking session.

Keep It Safe: Foods Dogs Should Never Eat
Choosing safe ingredients is crucial, along with avoiding xylitol. Always read labels carefully to avoid harmful foods like alcohol, chocolate, and caffeine; also garlic, onions, and nuts. Remember, even though dog treats can smell like our cookies, they shouldn’t contain sugar or butter. They’re made just for dogs.
3-Ingredient, High-Fiber Biscuits with Sweet Potato or Pumpkin
These dog biscuits are quick to make and smell amazing. They’re made with things you likely have at home and are great for your dog’s digestion. Simply preheat your oven to 400°F and get your pan ready with parchment paper.
Simple Pantry List: Oat Flour, Natural Peanut Butter, Mashed Sweet Potato
Start with these three ingredients: 1 cup oat flour, 1/4 cup natural peanut butter, and 1/2 cup mashed sweet potato. You can make oat flour by blending rolled oats until they’re fine. This mix makes treats that are soft but hold together well. You can also use whole wheat flour instead of oats if your dog is okay with it.
Pumpkin Purée Swap and Label Checks to Avoid Additives and Xylitol
Want to make pumpkin treats instead? Simply use the same amount of unsweetened pumpkin purée in place of sweet potato. Be sure to use plain canned pumpkin, not the pie filling kind. Choose peanut butter without xylitol, like Smucker’s Natural or Crazy Richard’s, which should only list peanuts and salt. This way, your treats stay simple and safe.
Mixing and Dough Fixes: Sticky vs. Dry and How to Adjust
Mix the mashed veggie and peanut butter before adding flour. If it’s sticky, just mix in more flour slowly. If it’s dry, add a little water, oat milk, or more mashed veggie. These tips will help you make a perfect dough that’s easy to roll.
Rolling, Cutting, and Customizing Size for Small and Large Dogs
Roll out your dough on parchment to your desired thickness. Remember, it won’t rise. Choose the size of your treats based on your dog’s size. You can use cutters or just cut squares with a knife for even baking.
Bake Times for Texture: Softer vs. Crunchier Treats
Bake for 10–12 minutes at 400°F for softer treats. For crunchier, go up to 15 minutes. For treats that last, bake at a lower temperature for longer, then let them cool in the oven. Always let them cool completely to keep them crunchy and tasty.
DIY Dog Biscuits
This DIY Dog Biscuits guide is easy and safe, and you can change it up. Begin with sweet potato: peel and boil until soft. Or you can bake it at 425°F for 40–55 minutes. Wait for it to cool, then peel and mash. No need for salt or spices since dogs adore the natural smell.
Here’s a simple dog biscuit recipe: combine ½ cup mashed sweet potato with ¼ cup natural peanut butter. Add 1 cup of flour, like oat or whole wheat, depending on what’s best for your dog. For dry mix, add a bit of water or oat milk; if it’s sticky, sprinkle in more flour. Roll the dough between ¼–½ inch thick on silicone or wax paper. Pick the size based on your dog’s preference, either small squares for training or big bones for chewing.
To bake: 400°F works for both soft and crunchy treats. For soft treats, bake 10–12 minutes. For crunchy, go for 15 minutes. Let them cool on the pan first, then transfer to a rack. For them to last longer, ensure they’re very dry or let them dry out in the turned-off oven. Keep them in an airtight container in the fridge for up to a week or freeze for two months.
Want a more traditional dough? Follow Erin Jeanne McDowell’s recipe. Mix ½ cup natural, unsalted peanut butter with 1 cup water and 2 tablespoons vegetable oil. Then add 1½ cups whole wheat flour and 1½ cups all-purpose flour. Combine until smooth, roll out to ¼ inch thick, cut into shapes, and bake at 350°F. This bakes until the bottoms are golden, around 12–18 minutes. This approach is cost-effective, avoiding fillers.
It’s crucial to avoid harmful ingredients like xylitol, chocolate, and grapes. Clean, simple flavors are what dogs love. Make a lot at once, size the treats for your dog, and use smart storage tips. This will save you money and reduce waste.
Making dog treats at home can save you a lot. For less than a dollar, you can make 40–50 treats using just one sweet potato. This is much cheaper than store-bought snacks, which can cost $10 or more. Using the recipe given above lets you control what goes into the treats. You can choose between oat flour and whole wheat based on your dog’s dietary needs.
Remember to bake treats according to how crunch or soft your dog likes them. Don’t forget to date the containers. Following this guide for DIY Dog Biscuits makes weekly prep simple. It’s something fun and rewarding for you and your dog.
Peanut Butter Biscuit Variations and Small-Batch Ideas
Peanut butter dog biscuits are perfect in small batches. You can experiment with texture, shape, and baking time easily. Plus, it’s great for keeping the kitchen cool and flexible for those busy days.
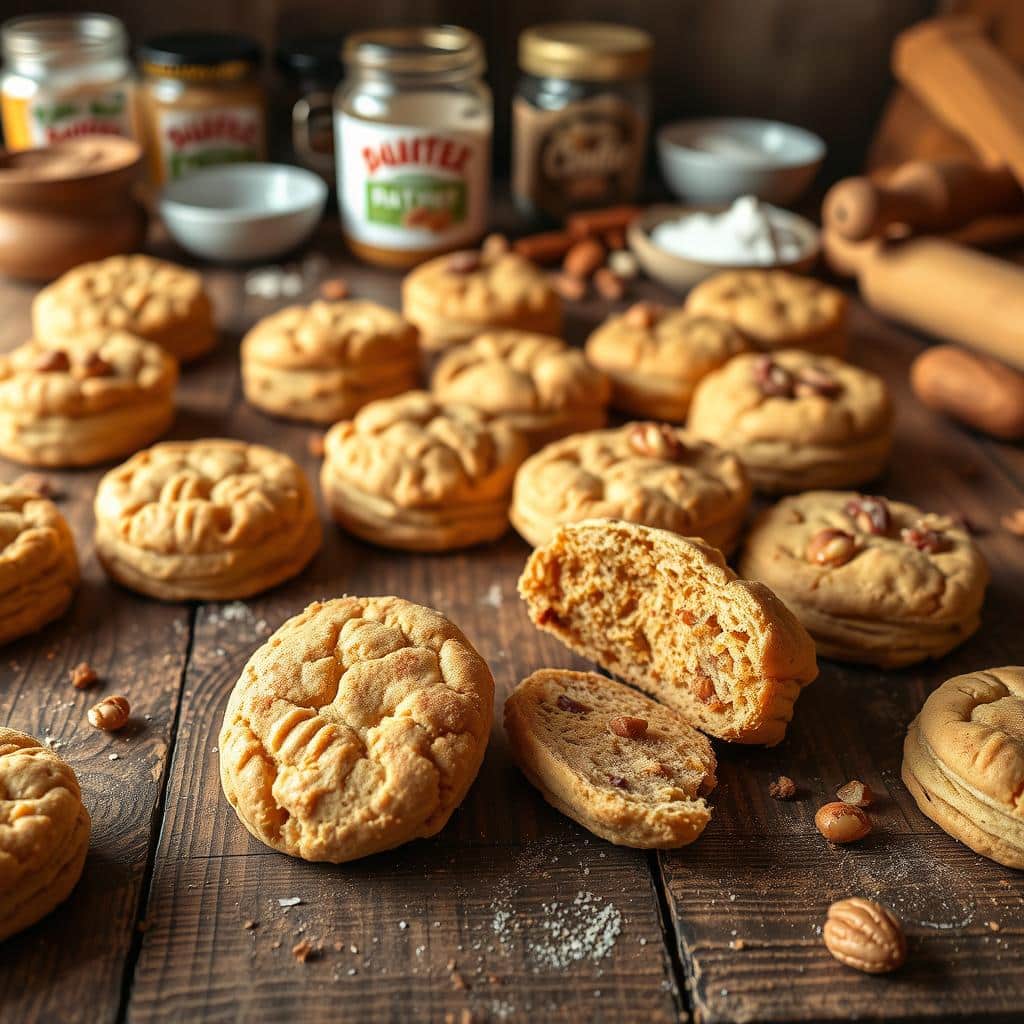
Whole Wheat and All-Purpose Blends for Classic Peanut Butter Biscuits
Mix 1½ cups of whole wheat flour with 1½ cups of all-purpose flour for crunch. Add 1 cup of water, 2 tablespoons of vegetable oil, and ½ cup of natural, unsalted peanut butter. Then, roll it out to ¼ inch thick and cut into shapes. This recipe makes sturdy, flavor-rich dog biscuits with a classic aroma.
If your dog needs something softer, use 100% oat flour. For moisture, add mashed sweet potato or unsweetened pumpkin. These changes keep the biscuit’s texture similar to whole wheat, but easier on sensitive stomachs.
Oven Temps and Doneness: 350°F Golden Edges vs. 400°F Quick Bakes
Baking at 350°F for 12–18 minutes gives you even color and crispy edges. This setting works well for larger shapes. For faster baking, set the oven at 400°F for 10–15 minutes. Biscuits will be softer in the middle at 10–12 minutes, and crunchy at 15 minutes.
To make them extra dry, bake at 350°F for 30–35 minutes. Then, let them sit in the oven after it’s turned off. This trick prevents burning while still removing moisture.
Training Bites, Larger Bones, and “Pupcakes” for Celebrations
For training, cut small treats like tiny squares or mini rounds. For a longer chew, make larger bones about ½ inch thick.
To celebrate, bake pupcakes. Just mix the biscuit dough with water, pumpkin purée, vegetable oil, and eggs. Bake these at 400°F for 15–20 minutes in a regular pan, or about 12 minutes for mini versions. It’s a festive way to use your favorite dog biscuit recipe.
Drying Biscuits for Shelf Life and Cooling Tricks
To keep dry biscuits longer, bake them until very dry. Then let them cool in the oven that’s turned off. Make sure they’re cool before storing. This way, they stay good at room temperature in a sealed tin for a bit.
For softer biscuits, best for senior dogs, keep them in the fridge up to a week or freeze. Roll under wax paper for neat edges. Cooling them right is key too—let them sit on the baking sheet for 5 minutes, then move to a rack. This helps steam escape, keeping the bottoms crispy.
Conclusion
This DIY Dog Biscuits summary is clear: simple ingredients, easy baking temperatures, and plans for your real life. Using oat flour, natural peanut butter, and either sweet potato or pumpkin makes it cheap—around $0.83 CAD per batch—and smells great. For texture, bake 10-12 minutes for soft treats or 15 minutes at 400°F for crunchy ones. These tips are about using good ingredients and simple methods any baker can follow.
If you like classic treats, try the 350°F peanut butter recipe. It uses whole wheat and all-purpose flour for about three dozen large biscuits. You can make them any size, and they stay fresh for two weeks in an airtight container. To keep biscuits longer, bake them until very dry and cool them in the turned-off oven; softer treats can be kept in the fridge or freezer. This way, you don’t sacrifice quality while saving money on homemade dog treats.
When making treats, choose ingredients safe for dogs. Avoid dangerous items like alcohol, chocolate, caffeine products, and certain nuts and fruits. Dogs prefer the smell over spices, so leave out salt and spices. You can also make oat flour or switch between pumpkin and sweet potato to fit your dog’s size and preference. This gives you the freedom to make treats just right for your pup.
Whether it’s a regular treat-making day or a special occasion for “pupcakes” at 400°F, these tips help you bake delicious snacks. Follow the baking guide for perfect soft or crunchy dog biscuits, and know how to store them to stay fresh. You end up with affordable homemade dog treats that smell great, are healthy for your dog, and make them very happy.


Discussion about this post